Here we go again! 🙂
It’s time to blog about Wedding Guest dress Number 2.
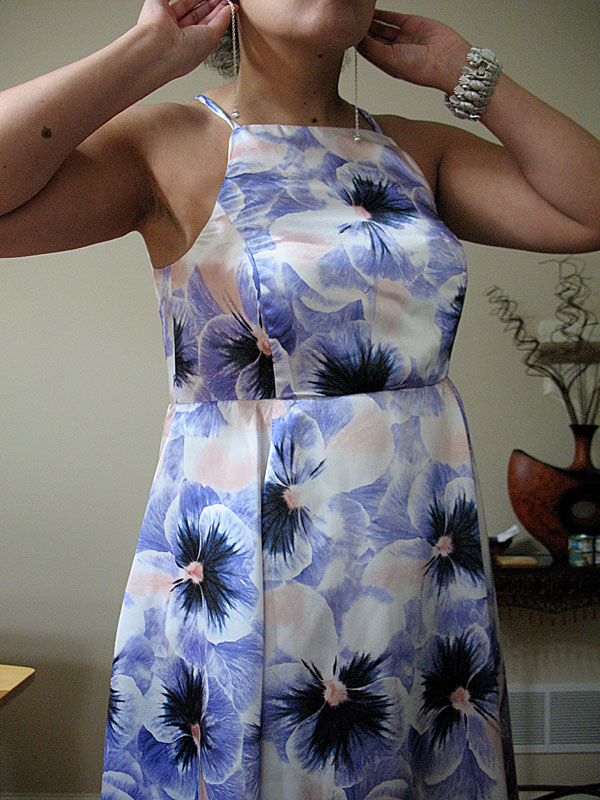
Since I went out of my comfort zone making the dressy jumpsuit previously, I made up my mind and chose a fancy dress to sew for the second wedding. Interestingly enough, I found the fabric first and used that to pick the pattern instead; a lovely charmeuse in a purple poppy watercolor print with blush pink accents. Perfect material for this project.
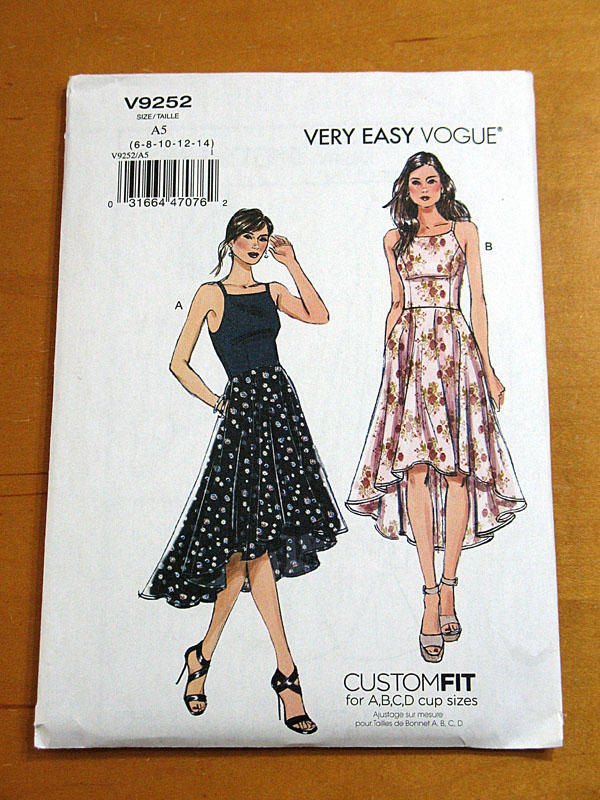
After looking through my dress pattern collection, I landed on this Vogue option as the One. I particularly liked the halter neckline style and wanted to learn how to sew it for a possible future Copycat Fashion idea.
The fabric is bought, the pattern is chosen, and now the sewing begins.
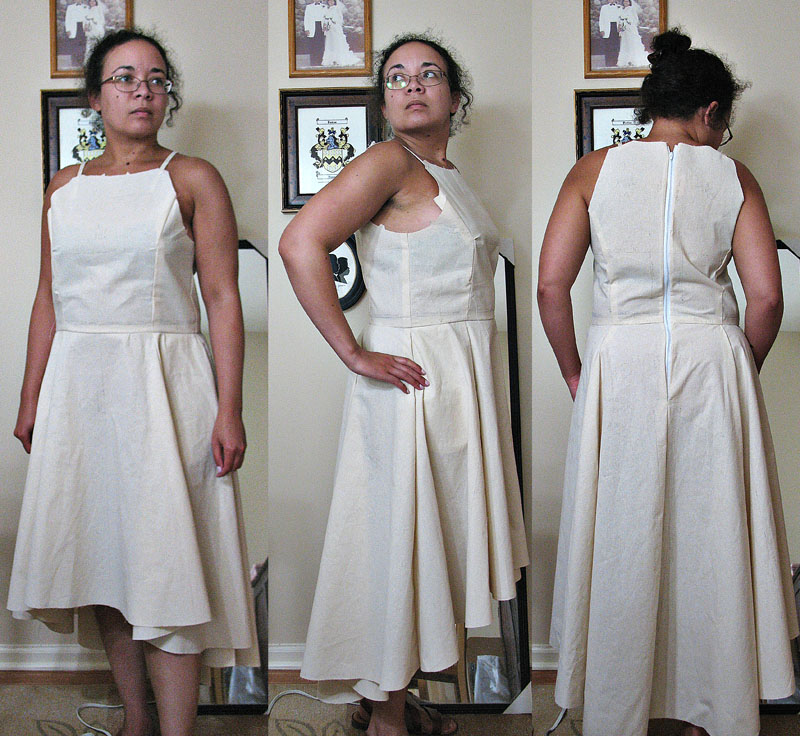

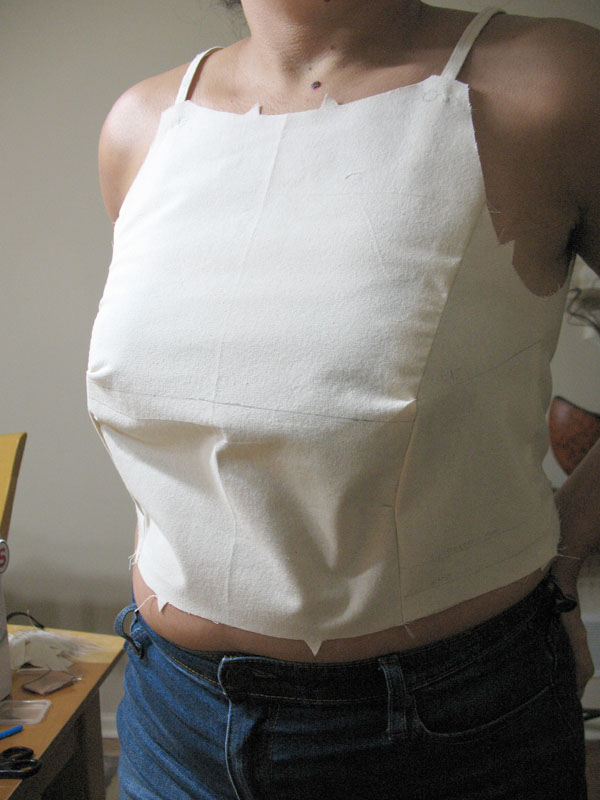
Just like the jumpsuit project, I went through a series of toiles to test out pattern sizes and proportions. This pattern has separate bodice pieces for bra sizes A, B, C and D for better customization opportunities. I chose the A bodice to work with, but my first attempt putting this dress together ended up being too big and too long all over. YIKES!
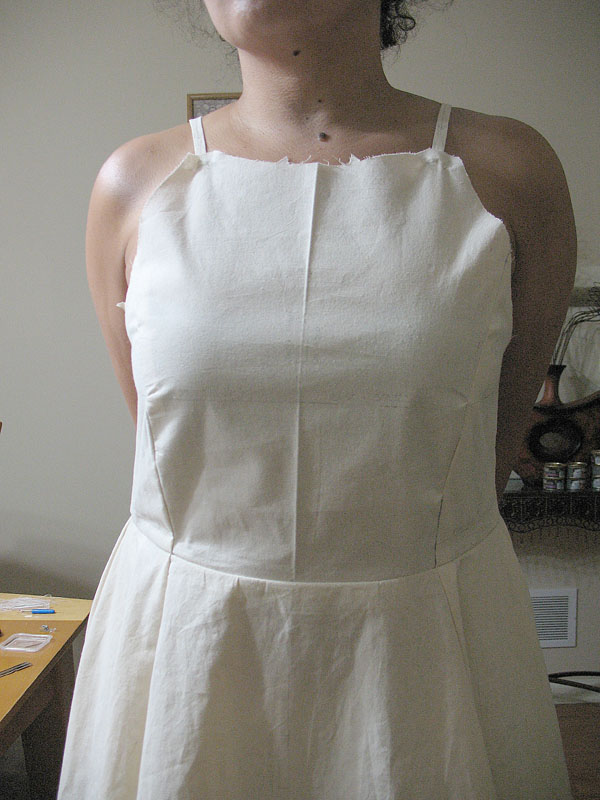
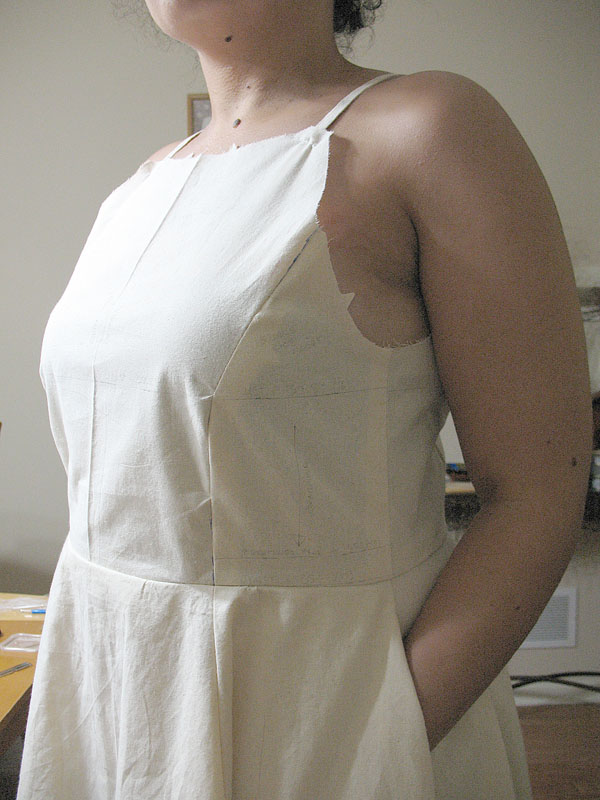

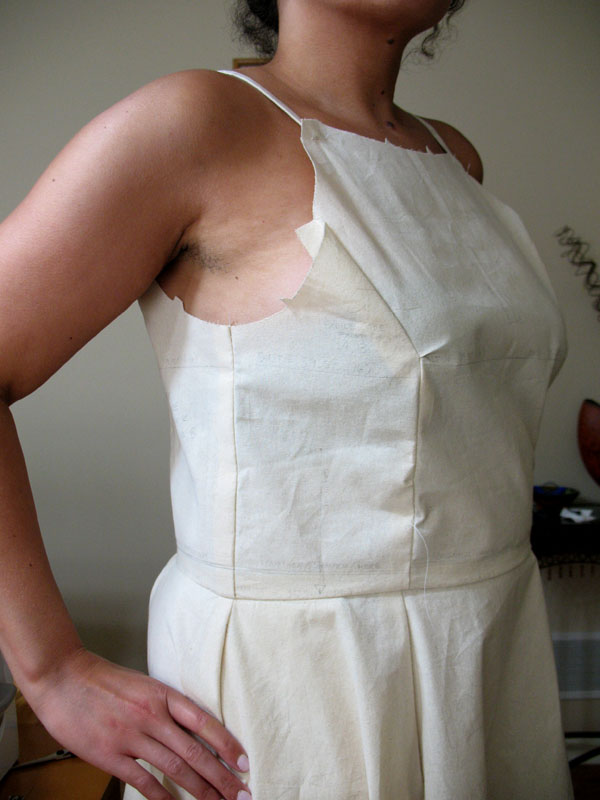
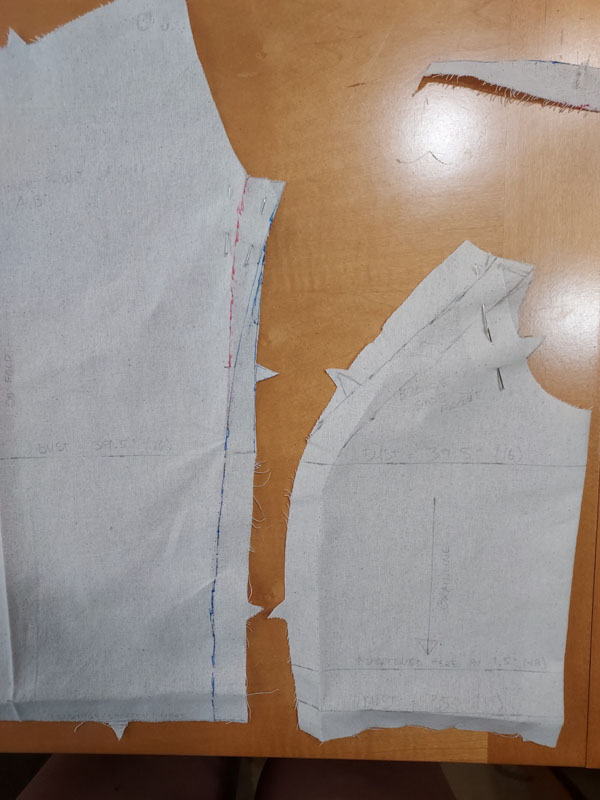
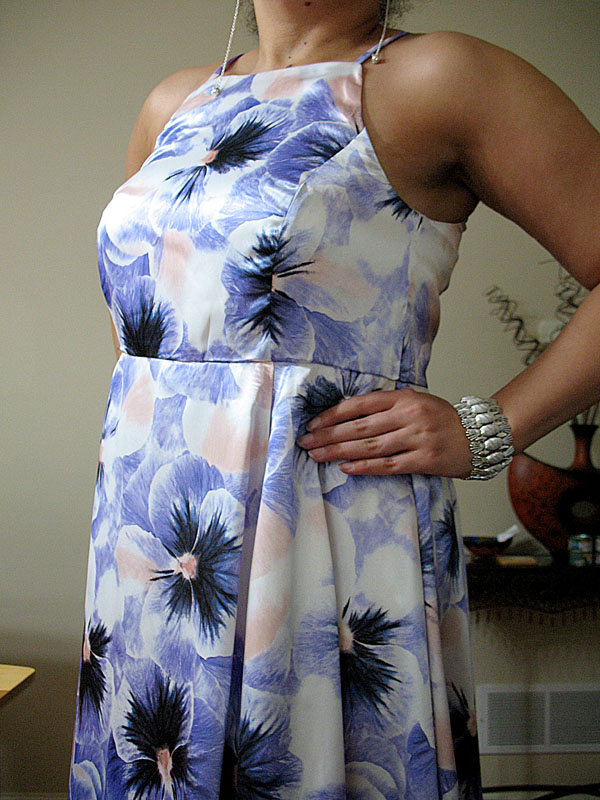
The second attempt was bringing me closer to fitting my figure better with a shorter bodice length and a smaller waist size, but I was still having fit issues in the bust. The neckline was too roomy even though the dress was closely fitted everywhere else. I had to get drastic and do a special princess seam small bust adjustment to the bodice pattern pieces, which I’ve never done before. Here are links to 2 YouTube videos I watched that really helped me learn how to do it properly:

**** SMALL BUST ADJUSTMENT ****
WHAT IS IT?:
https://www.youtube.com/watch?v=b5LOX7_ItaM
HOW TO DO IT ON PRINCESS SEAM BODICE:
https://www.youtube.com/watch?v=mPN_1e87L8w
**** SMALL BUST ADJUSTMENT ****
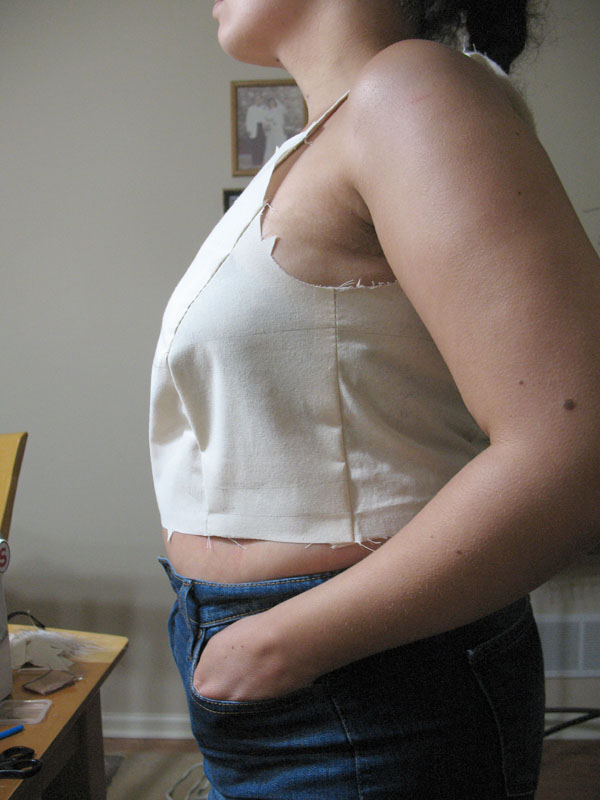
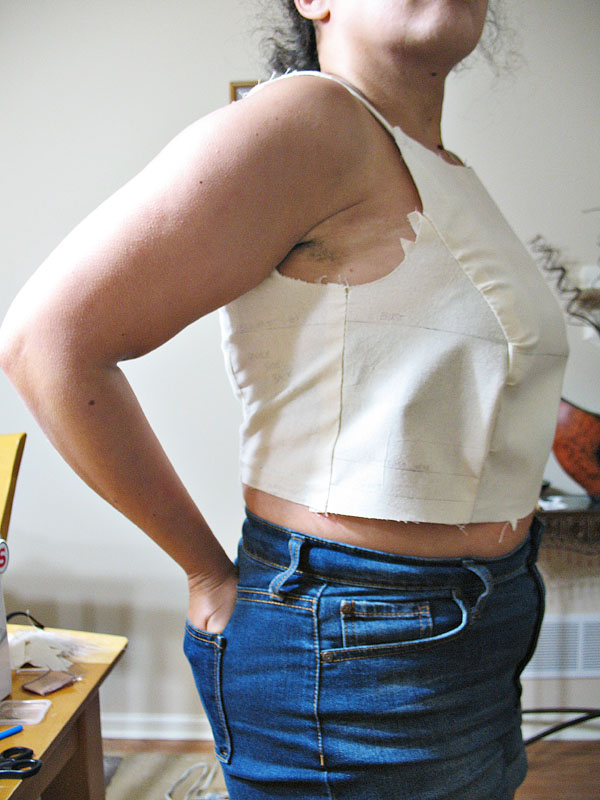
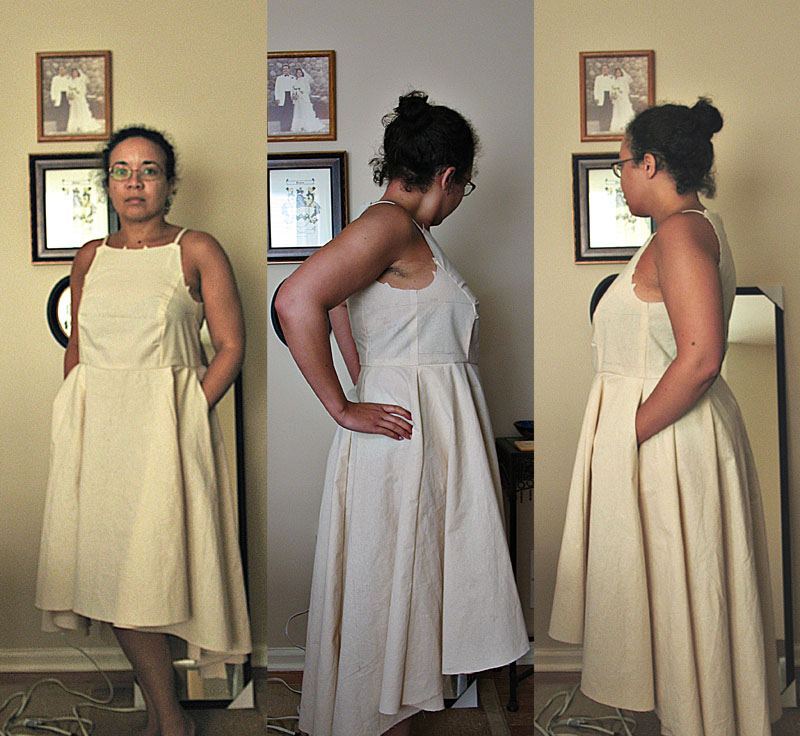
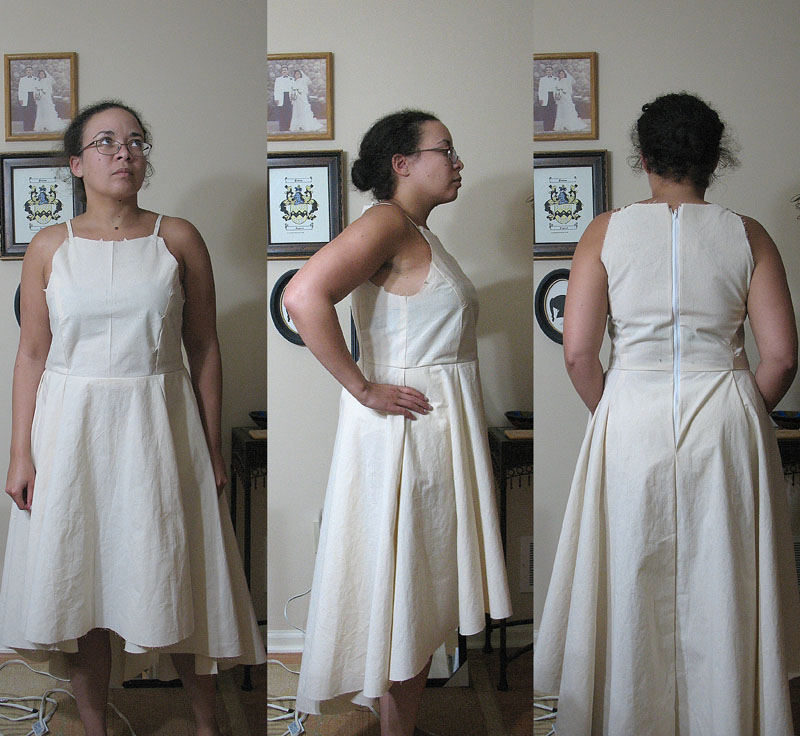
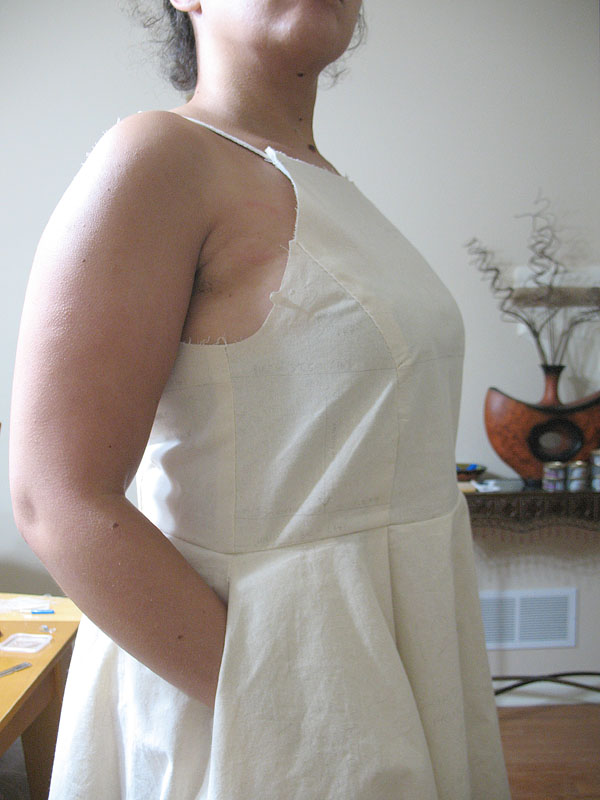
FINALLY, I succeeded in making this bodice fit! After doing the small bust adjustment, I still had a little too much room along the neckline & the armscye. Here I molded this area on the left side of my dress while wearing it using some tucking & pining scrap fabric to get the close fit I’ve been looking for. Then I marked the ‘seamline’ on the pattern pieces and traced the modified versions on new muslin for another fitting. This time I got it. The dress now fits me exactly how I wanted it to and is ready to be made for real.
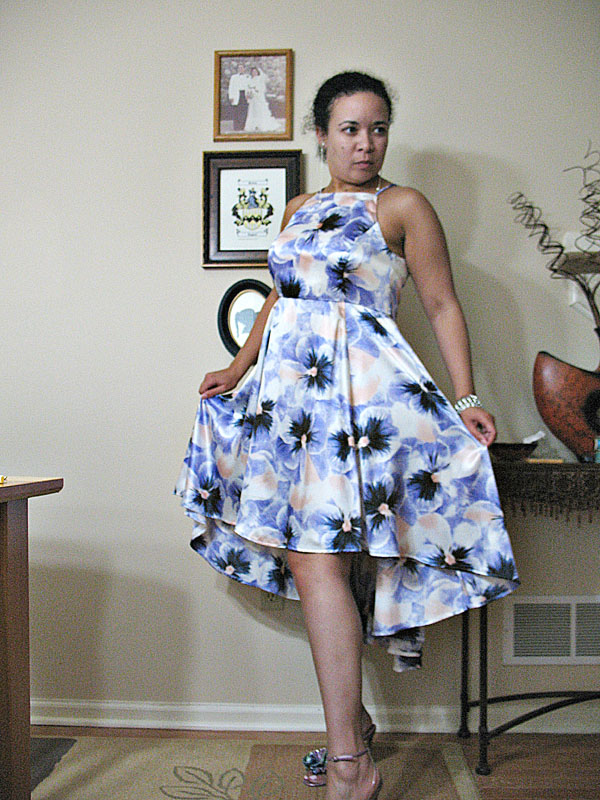
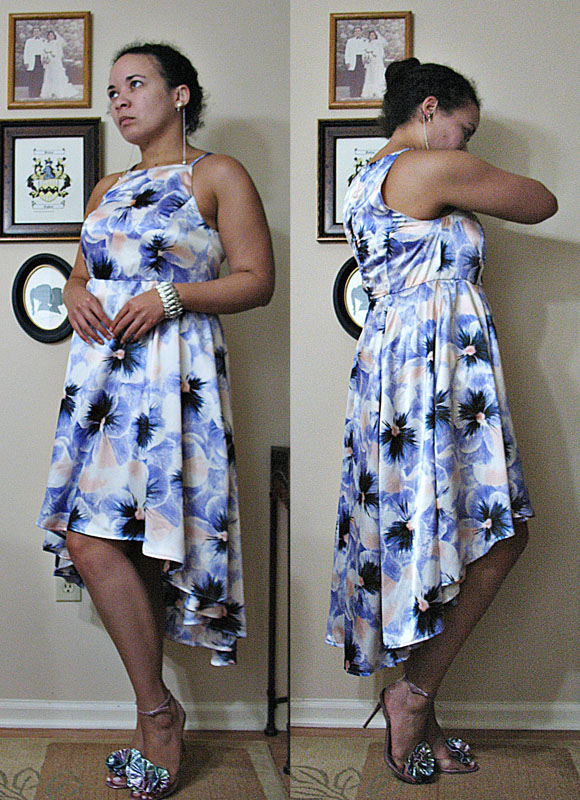
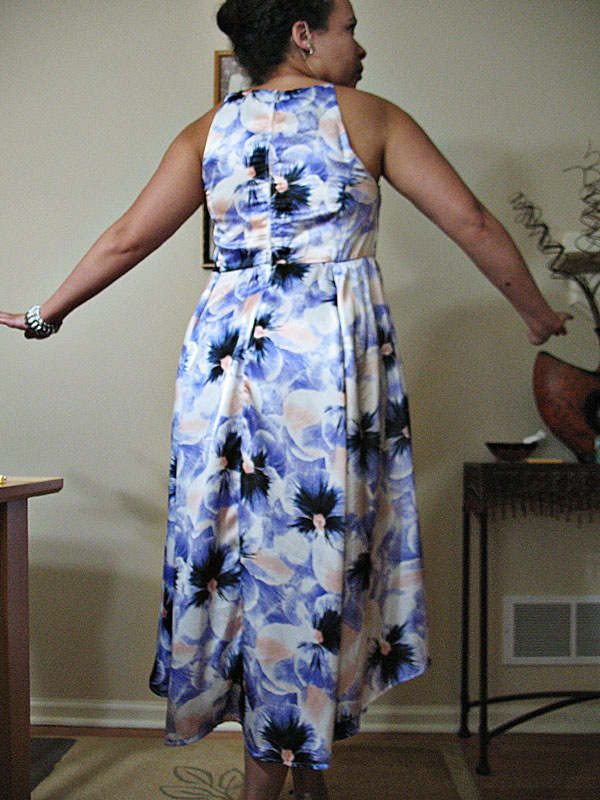
After all the toile redos and adjustments, the final product felt like a huge relief once I tried it on. The bodice laid flat on my chest and had a close but comfortable fit all around. However, the skirt panel lengths came out uneven due to massive slippage while cutting out the pieces from the silky charmeuse fabric. VERY ANNOYING. Thankfully I managed to even the lengths out and sew the hem properly in the end. If I were to make this dress again I may add a little bit of length to the bodice so its look is less empire-waist-looking (not that there’s anything wrong with that, lol).
When it came to actually constructing it, I would say the pattern had very simple instructions to follow but not quite as simple when figuring out the right size. Like I previously mentioned, the Size A bodice was too big on my even when it fit in the waist so there was some significant adjustments I had to learn how to do myself. Fortunately I have several years worth of sewing experience so I was able to figure it out, but for novices just starting out I say hold off getting this ‘Very Easy’ Vogue pattern based on the bust adjustments necessary for a proper fit.
And on that note, Wedding Season is officially over! Onward to the next challenge…:)