Happy August! This is a project I completed 2 weeks ago and have now gotten around to blogging about it. Just enjoying summer too much I guess. 🙂
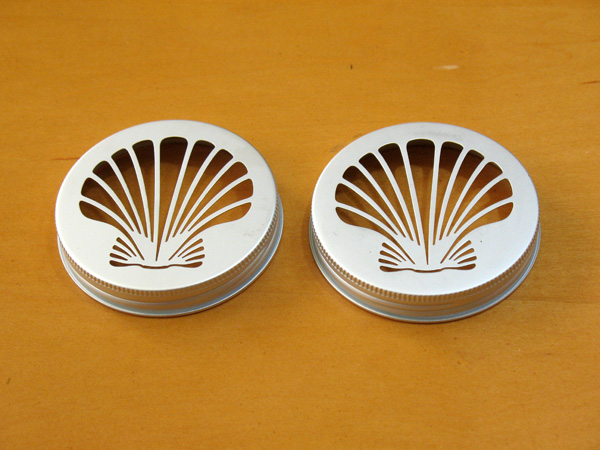
Anyway, this was inspired by some recycling on my mother’s end. She handed me some jar lids from Pier 1 air fresheners thinking I could use these as stencils. Good eye Mom & thanks for the next project idea! I even treaded into uncharted territory and video recorded some of the process to post online, just to see if I could. Check it out!
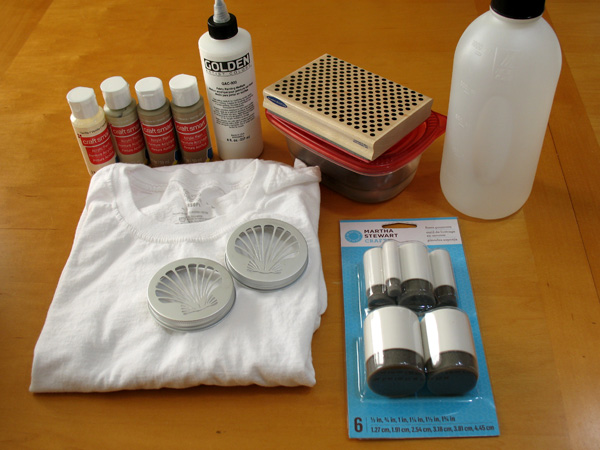
Here are some of the supplies I collected for this. Besides the jar lids, I have my t-shirt (a large), some regular acrylic paint from Michaels, a polka-dot rubber stamp with some special items to clean it afterwards (distilled water, plastic container with baby shampoo), and some new items that I’ve been meaning to try to see if they work…
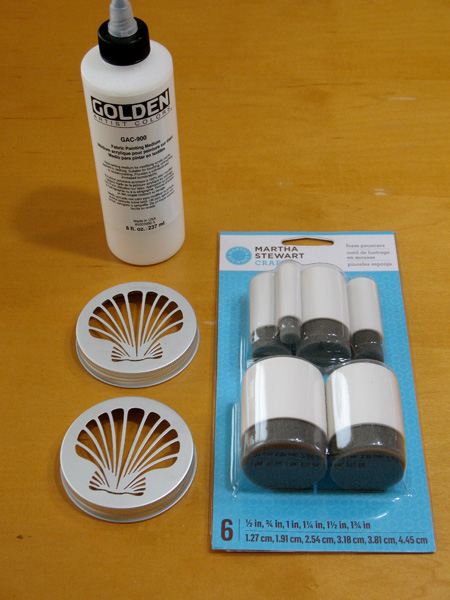
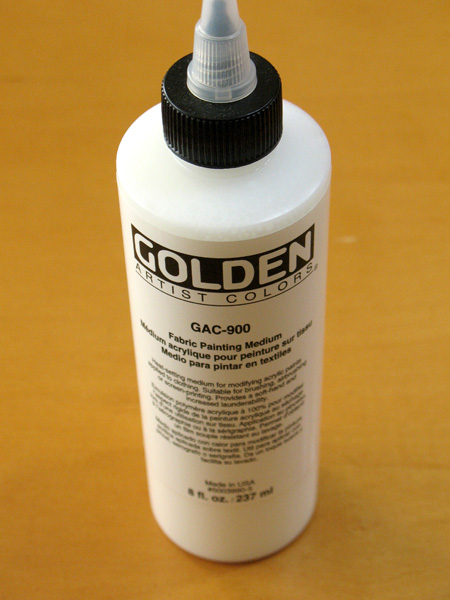


I found this fabric paint medium made by Golden at Michaels & wanted to try it. I am a BIG fan of this brand’s Fabric Screen-printing Gel Medium; you can basically turn any inexpensive acrylic paint into fabric screen-printing ink and it is awesome. However, it is not in craft stores, so this is the next best thing. Let’s see if it’s as good.
The pouncer set I came across as I was heading to the cashier’s to pay 5.99 for a simple 3-pk of cheap sponges on wooden sticks. Then I see Martha Stewart’s stencil pouncer set with 6 in different sizes and removable plastic holders for cleaning convenience priced at 5.99. Now you tell me what is the better deal, right? 🙂
Next is a rubber-stamping mat I picked up at Hobby Lobby that I thought would make the stamping process of this project easier with a softer surface for a cleaner stamp. Let’s see if this works too!
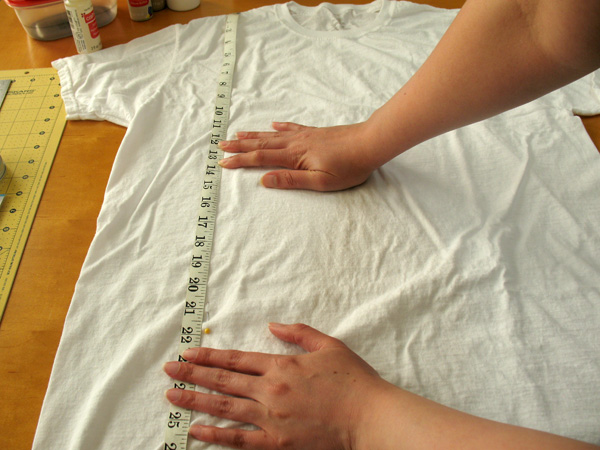
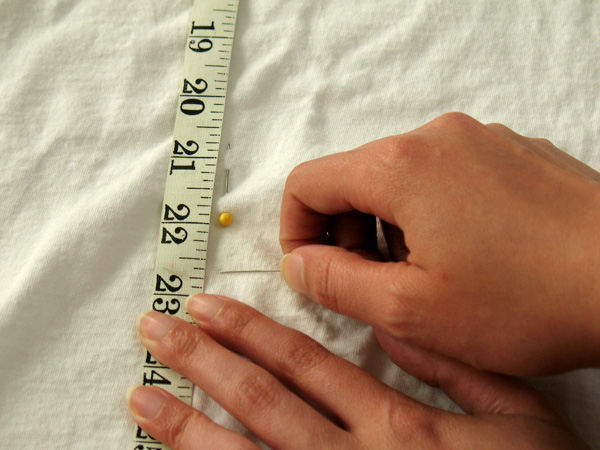
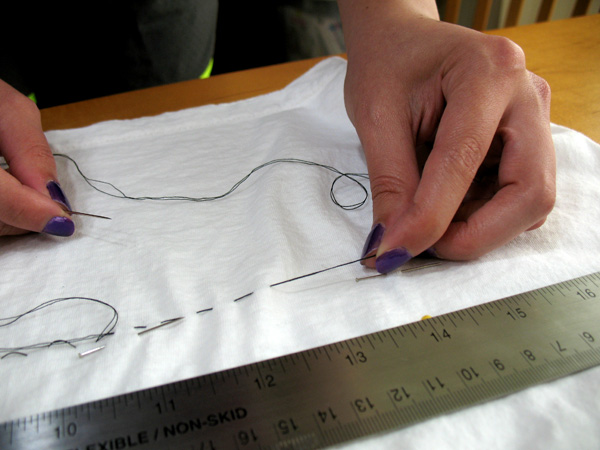
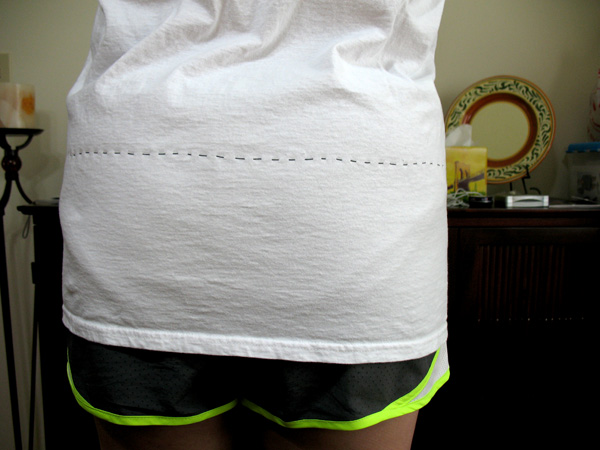


First, I wanted to mark on the t-shirt where I wanted to crop it, but not cut it until after the painting was done. So I measured the length I wanted and marked it using a basting stitch around the t-shirt. Of course, I knew my efforts wouldn’t make a straight line right away, so I purposely made the basting stitch outside of where I wanted to give me a chance to clean up the hem without cutting it too short.
Okay, now that I prepared the shirt, here is my video footage of decorating the shirt with my supplies:
I know it’s a little ‘amateur hour’ but just like crafting, I have to accept minor mistakes & keep practicing to get better right? RIGHT! 🙂
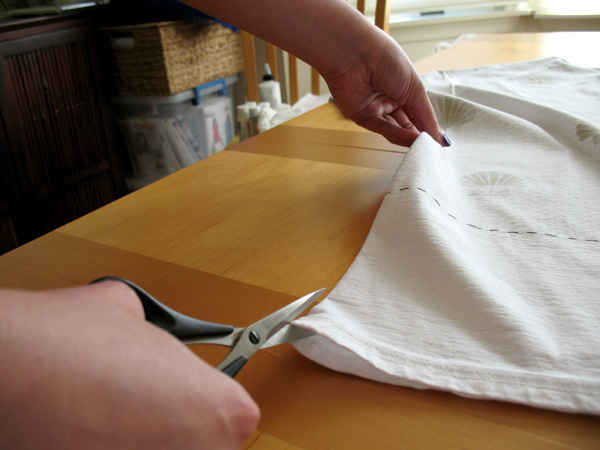
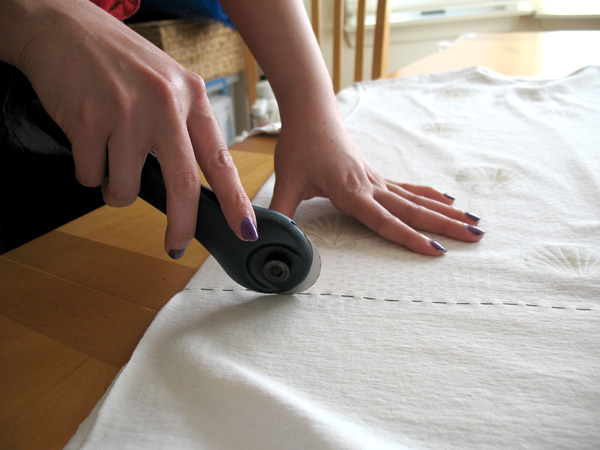
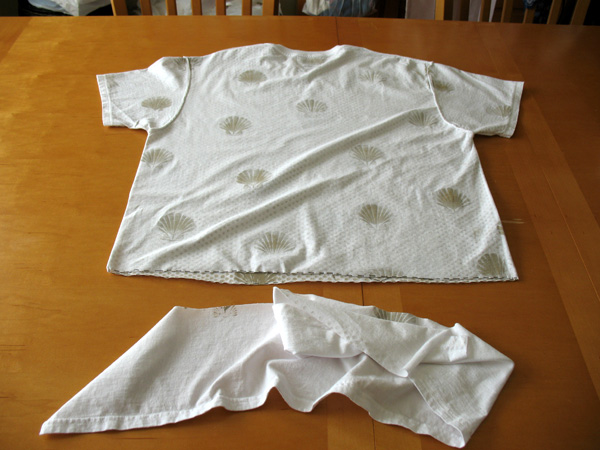
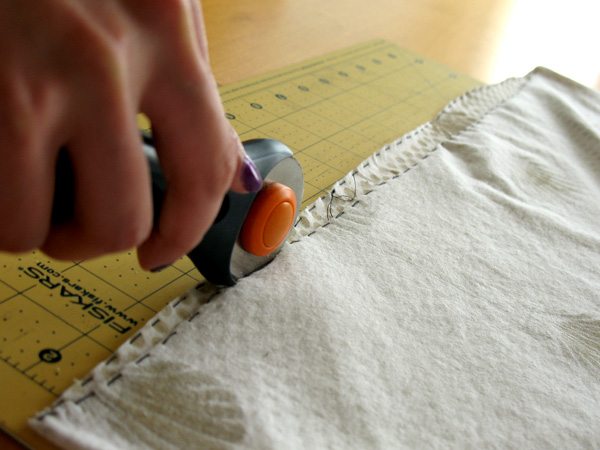
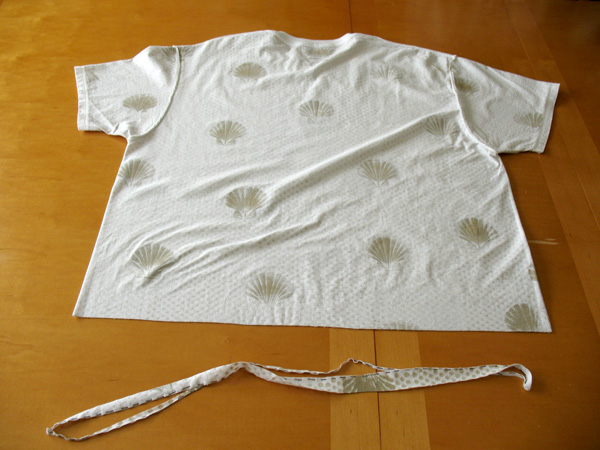
Alright, I have finished painting my shirt and it’s time to hem it. First, I turned it inside out, then made my cuts to the bottom before hemming it on my sewing machine with a zig-zag stitch. Just as I thought, I needed to fix my raw hem by cutting it a second time to even it out:
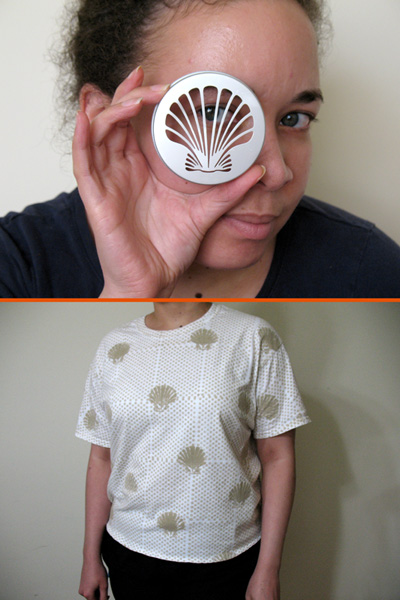
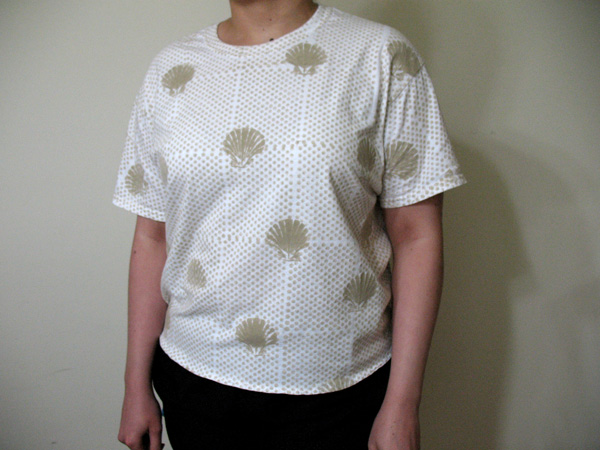
AND NOW HERE’S THE FINAL REVEAL!
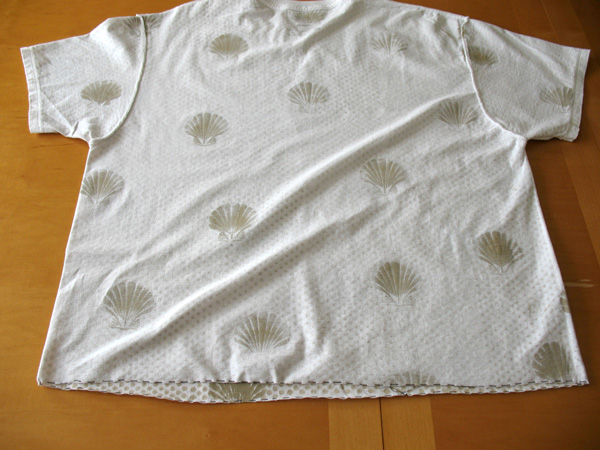
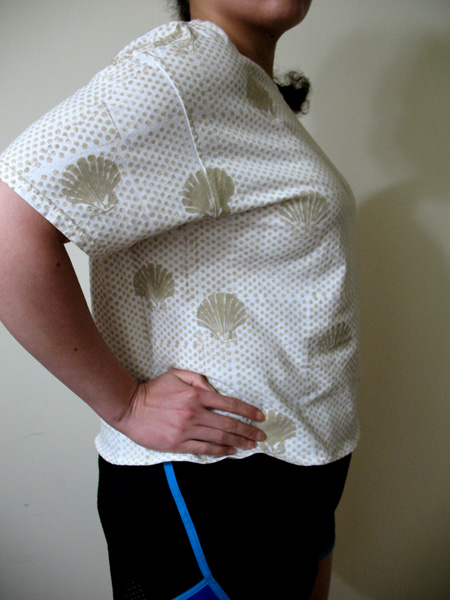
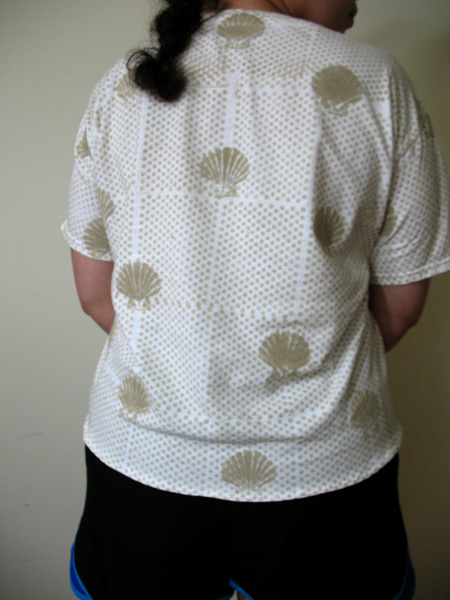
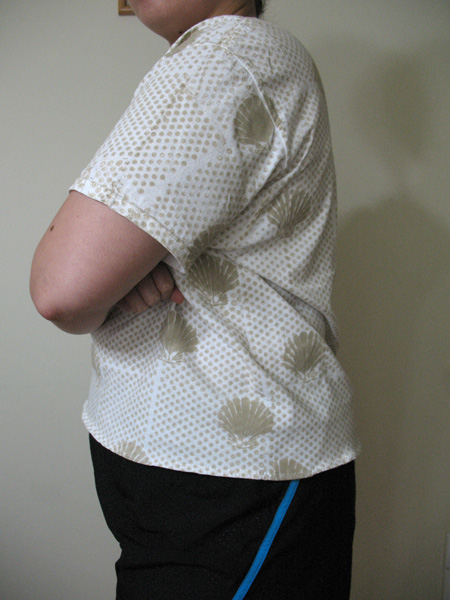
So if you are unable to sit through all these videos (next time I’ll have to learn how to edit them together), here are stills of the final product:

Here is my conclusions list:
- Overall I like the shirt. It fits nicely over my hips without exposing too much of my mid-section (baby steps until my 6-pack comes in 🙂 ). I won’t have to worry about it stretching over my hips and making it uneasy to wear.
- The painting process wasn’t stressful. The Golden Fabric Paint Medium had a very thin consistency, so whenever I wasn’t too cautious the paint came out muddy in places when it wasn’t completely soaked up into the sponge pouncers. However, I do actually like the medium overall and I would use it again for future projects with practice of course.
- The Martha Stewart Stencil Pouncer Set was worth EVERY PENNY. To think I almost paid the same price for a cheap generic 3-pack that I would have had to throw away after using them. Here this set was washable and reusable which was the best part of this set. I highly recommend this product for any and every paint project whether it’s fabric, paper or home decor.
- The Fabric Creations Rubber Stamping Mat is originally for wood block printing, but I found it was just as good with creating clean images on fabric with rubber stamps. I got mine at Hobby Lobby, but if it’s not there anymore, you could probably find something similar online. It’s not necessary to print on fabric, but it is an asset if you can get it.
- Last but not least, the Pier 1 Air Freshener Jar lids. These were pretty neat to use as stencils. With practice I was able to pounce the paint to the fabric, but due to its thin consistency it got muddy in certain places whenever I used too much paint. I’m sure if the paint were thicker there would have been a different outcome. I’ll have to test that theory one of these days. There are other jars like these with different lid designs and they’re 5.00 each, so I guess I’ll need to buy more for future stencil projects. They’re cheap enough! 🙂
I’m glad I got around to making this shirt to try out all this stuff so that I can do it again and take it to another level. Stay tuned and cool!